AtomicTorch Localization Utility
Unpack the core file
Before starting to work with the Localization Utility you need to unpack the core file which contains all the content (including languages) used in your current version of the game.
Usually you can find it in:
- Steam: C:\Program Files (x86)\Steam\steamapps\common\VoidExpanse\Core\core.cpk
- AtomicTorch Starter: C:\Users\<USERNAME>\AppData\Local\AtomicTorchStudio\Launcher\Games\VoidExpanse\Core\core.cpk
This file actually is a simple .zip file, so you can unpack it with any archiver software which can unpack .zip files. You can even rename the file to core.zip before unpacking. Create a folder for contents of this archive and unpack it there.
Download Localization Utility
You can download localization utility here: http://atomictorch.com/Files/LocalizationUtility.zip
Unpack it somewhere, it doesn't need installation. Run AtomicTorch_ModsLocalizationUtility.exe application.
Selecting the core package source
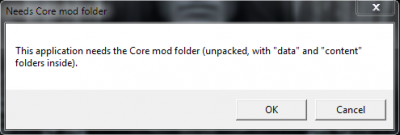
The program needs you to select a source package which is going to be a basis for your work. This is the package we unpacked earlier. When you run the program for the first time it will show you this message:
Press "Ok" and follow to the file browser window, where you need to select the folder where you have unpacked the .cpk package. You can always change the core folder, using "Select core mod folder" button at the main program screen.
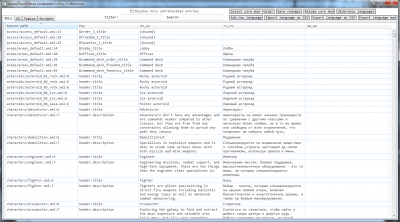
After selecting this folder and confirming it, the program will go to the main localisation interface.
Editing and adding a new language
On the top left part of the screen you see a tabs which allow you to switch between different groups of textual content of the game. Starting with the third column of the main window there are languages columns, the lines conisting corresponding sentenses in different languages. Basically there are two languages, English-American and Russian. These localizations are ready and to start a new one, you need to add a new language column.
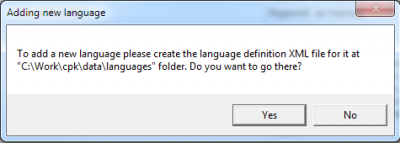
To do so press 'Add new language' button. The program offers to create a new .xml file for your language and to open the folder, where these .xml files are stored. Agree to that.
When the folder opens, you will see something like that:
Each language has its own configuration file and you need to create a new one. The easiest way is to copy the existing file and rename it according to the language you are going to localize. After that you need to open this file with notepad and change the corresponding parts of it according to the language you chose.
The imporant moment is that the game recognizes distinct language codes. So renaming the .xms file and changing it needs to be done referring the language code table below:
| Language | Language code |
|---|---|
| Afrikaans | af_za |
| Arabic | ar_ae |
| Basque | eu_es |
| Belarusian | be_by |
| Bulgarian | bg_bg |
| Catalan | ca_es |
| Simplified chinese | zh_ch |
| Traditional chinese | zh_tw |
| Czech | cs_cz |
| Danish | da_dk |
| Dutch | nl_be |
| English | en_us / en_uk (and others) |
| Estonian | et_ee |
| Faroese | fo_fo |
| Finnish | fi_fi |
| French | fr_fr |
| German | de_de |
| Greek | el_gr |
| Hebrew | he_il |
| Hugarian | hu_hu |
| Icelandic | is_is |
| Indonesian | id_id |
| Italian | it_it |
| Japanese | jp_jp |
| Korean | ko_kr |
| Latvian | lv_lv |
| Lithuanian | lt_lt |
| Norwegian | nb_no |
| Polish | pl_pl |
| Portuguese | pt_pt |
| Portuguese-brazil | pt_br |
| Romanian | ro_ro |
| Russian | ru_ru |
| Serbocroatian | sr_sp |
| Slovak | sk_sk |
| Slovenian | sl_sl |
| Spanish | es_es |
| Swedish | sv_se |
| Thai | th_th |
| Turkish | tr_tr |
| Ukrainian | uk_ua |
| Vietnamese | vi_vn |
After you renamed and edited the new .xml file you must restart the program. When it starts you will see the new language column there. All the fields in it are blank for now, this is where your work starts. Just click on the field, put your translation in and press Enter. The cursor switches to the next line below and you can start editing it by double-pressing Enter of clicking Left Mouse Button on it.
Filter and Search
Filter and Search fields upon the main editing window can make your work fast and more comfortable. If you put a word or sentence into the Filter field, the program will leave on the screen only the lines consisting that sentence. If you put a part of the text to the Search field, the program will highlight all the text matches with this sentence.
Import and export of the CSV files
The Localization Tool is able to use and create some external sources of content. You can use any Microsoft Excel compatible programs and files for localisation.
Exporting
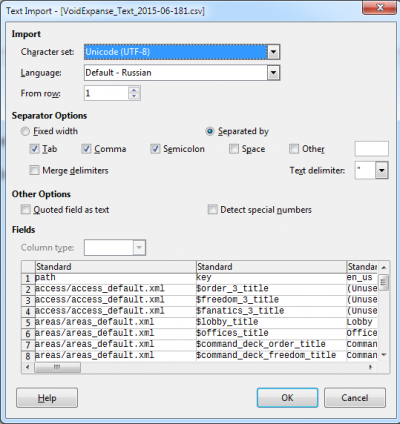
Exporting is easy: just press "Export language as CSV" button on the main screen and select the folder and the name of the file you want to export to. Just confirm it when you are done with selecting the folder and choosing the name of the file. When you try to open this file by double-clicking it, you may meet such a window:
You need to specify how you want to open this file because there are many ways of doing it. In our case you just need to press "Ok".
Importing
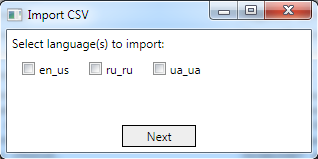
If you want to Import the the content from CSV-file, first you need to press "Import language as CSV" button. The program will offer you to select the file to import the content from. When you are done and confirmed it, the program will ask which languages need to be imported from the selected files:
Just check the boxes near the language codes you want and press "Next". The program will replace the existing core languages with the new content from the file. NOTE that you can import ONLY the languages which already have a .xml file created and have their column in the program. All other languages will be ignored.
Other features
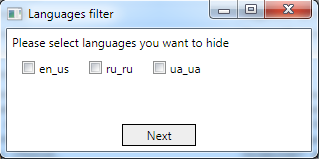
Hide/show languages Sometimes you may need to temporarily hide some languages to prevent confusing during the translation. To do so press "Hide/show languages" button on the main Localization Tool screen. The program will offer you to select the languages you want to hide:
Check the appropriate boxes and press "Next". To show the hidden languages again, you need to press "Hide/show languages" button again and just uncheck the boxes, then press "Next".
Reloading the core mod If you need to discard all the changes you made after running the Localization tool, there is button for it. Press it, confirm and all the changes will be reset.
